Creating a site with Citrix XenDesktop 7.18

Reading Time: 3 minutes

In my previous post here I showed how to install Citrix XenDesktop 7.18 Delivery Controller. Creating a site with Citrix XenDesktop 7.18 is the next step. This process can be complicated because there is SQL database connectivity involved. The requirement for SQL is version 2008 SP3 or higher. For a complete set of requirements check this link here.

Deliverables of this post:

  • Configure a XenDesktop Site and connect it to SQL Server.

Requirements for the configuration:

  • Microsoft SQL Server.
  • Active Directory Domain.
  • Citrix XenDesktop 7.18 Delivery Controller.

Create a site using Citrix Studio

Creating a site with Citrix XenDesktop 7.18 is done using Citrix Studio. This management tool is automatically installed if you followed my post here.

Start Citrix Studio from the start menu.

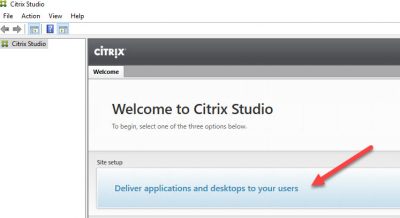
Click on the first option in the middle of the console: Deliver applications and desktops to your users.

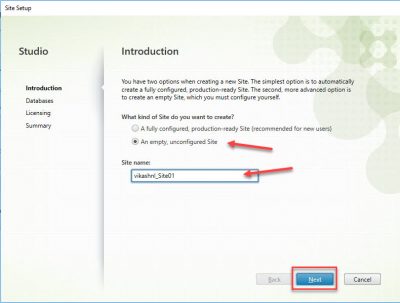
Select the option An empty, unconfigured Site. Enter the site name you want and click on Next.

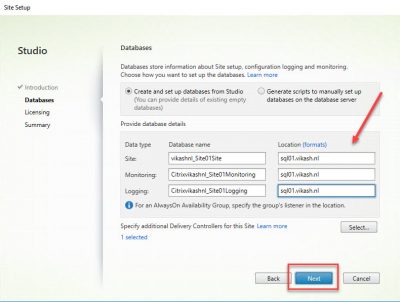
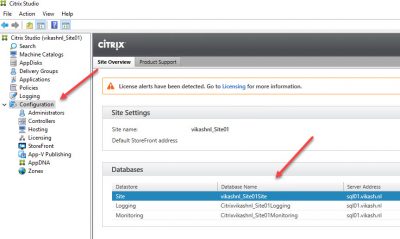
Now this is the part where you have to pay attention. Check the names of the databases that are created. Three databases are created. Enter the correct SQL connection information in the Location field. Click then on Next.

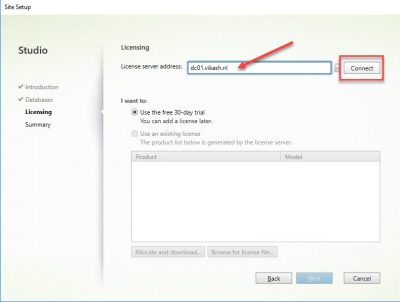
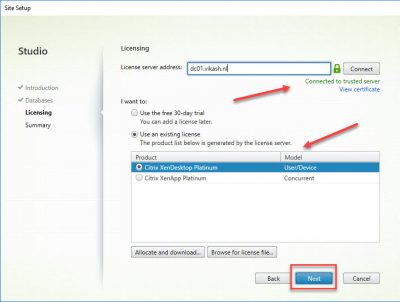
Enter the name (or ip address) of your license server. Then click on Connect.

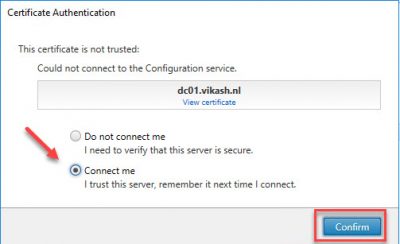
The setup wizard will connect to your license server. Because the Citrix License Server is installed with a self-signed certificate you will get a popup windows asking you if you trust the server. Select Connect me and click on Confirm.

You will now be presented with a list of available licenses on the license server. Select the appropriate one and click on Next.

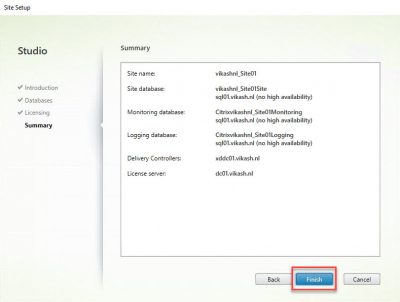
Finally you will be presented with a summary screen. Double check that all the options and names are correct and then click on Finish.

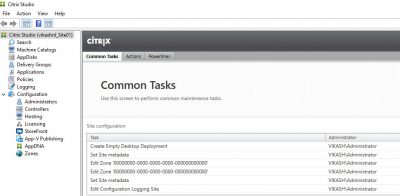
After the configuration is finished you will be presented with an overview in Citrix Studio. From here you can take following steps. In upcoming posts I will show you where to take from here.

Check the database connections in Citrix Studio. Click on Configuration in the left column.

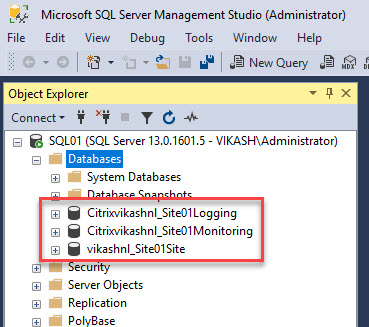
Using SQL Management Studio you can check the databases on your SQL server.

This concludes this blog post. In following posts I will show you what to do next to get your XenDesktop farm online. Feel free to contact me of you have any questions or comments.

You can follow me on twitter or add the RSS feed from my blog and you will be notified when I add new posts.


Creating a site with Citrix XenDesktop 7.18 Read More

Citrix XenDesktop 7.18 Delivery Controller installation

Reading Time: 4 minutes

In my last post here I showed how to setup Citrix Licensing Server. This is one of the main components for any Citrix environment. In this post I will cover Citrix XenDesktop 7.18 Delivery Controller installation. I will be needing this to publish my desktops and applications. I will show you in future posts how to integrate with Citrix NetScaler, Azure and also implement MDM and MAM solutions in my environment. So for now let’s start the setup.

My lab setup:

  • Active Directory on Server 2016.
  • Citrix XenDesktop 7.18 ISO downloaded from the Citrix website.
  • Microsoft SQL server.

Install Delivery Controller

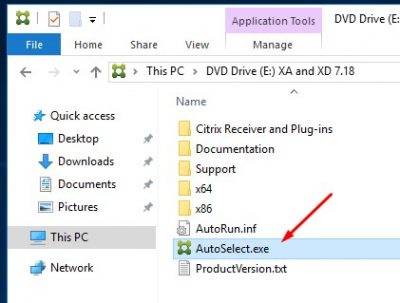
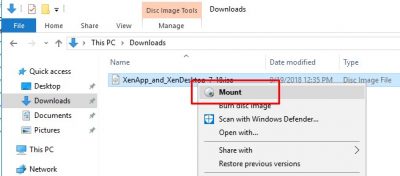
Download the installation ISO from the Citrix site and mount it using Windows Explorer. Double click on AutoSelect.exe to start.

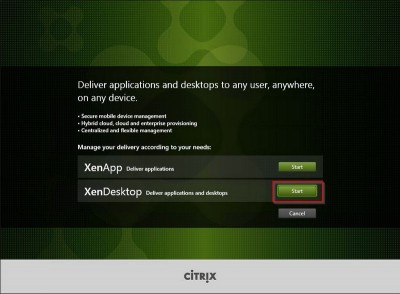
Click on Start the XenDesktop line.

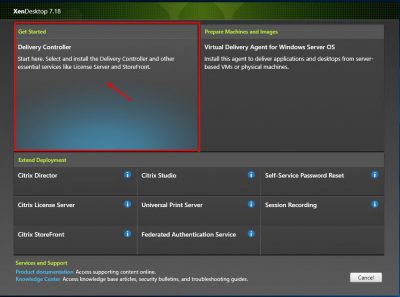
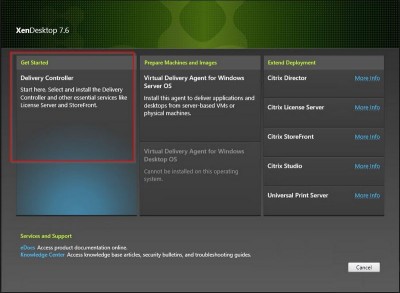
Select the Delivery Controller option. As you can see here there are options to install the other components. I will show these in upcoming posts. For now let’s click in Delivery Controller.

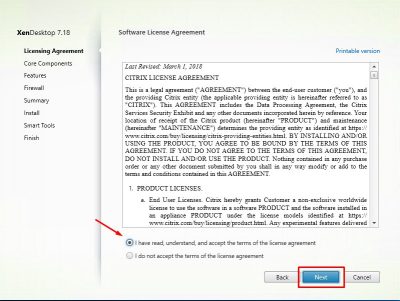
Agree with the Software License Agreement here. Click then on Next.

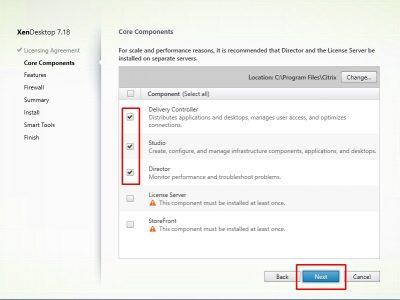
Select the components you wish to install and click on Next.

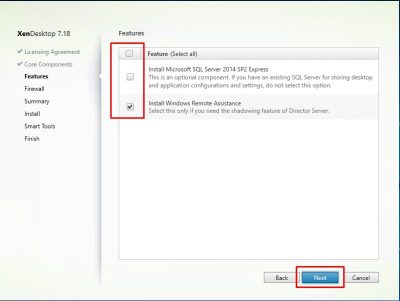
Again select the options you wish. I have a dedicated SQL server so I will not install SQL Express. Click on Next.

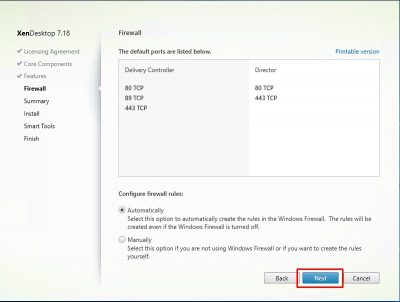
Leave the options default and the wizard will configure the firewall on the server. Click on Next.

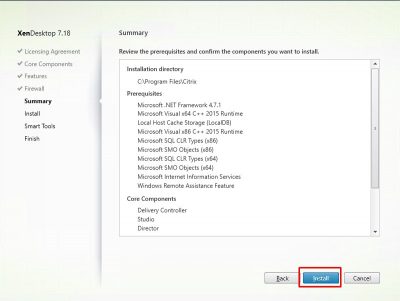
You will get a overview of the components that will be installed. Click on Install.

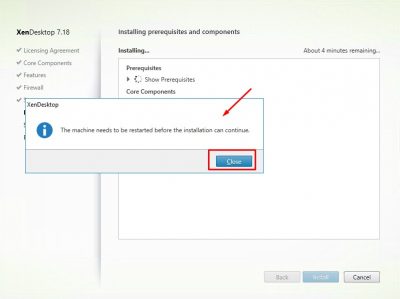
You will see a popup about rebooting your server. Click on Close.

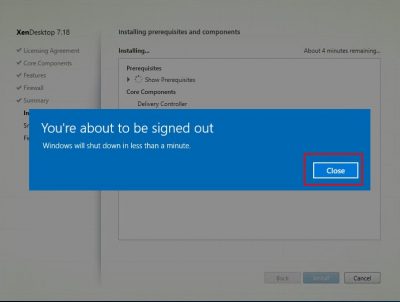
You will be signed out from the server and it will reboot. You can click on Close or wait for the server to sign you out.

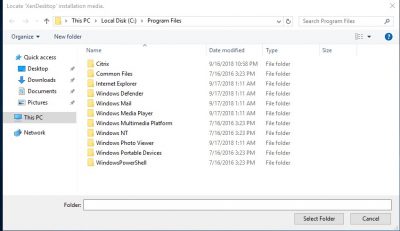
After you logging in you will be asked for the XenDesktop setup files. Do NOT close this window.

Open up Windows explorer and re-mount the ISO.

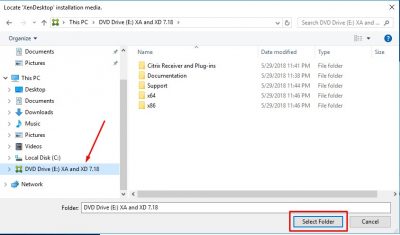
Now go back to the window that opened up after the reboot labeled Locate XenDesktop installation media and browse to the XenDesktop ISO you just mounted. Select the DVD drive in the left column. Then click on Select Folder.

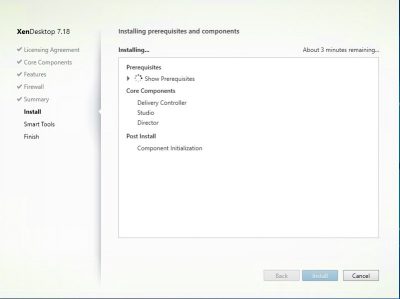
The setup will now continue.

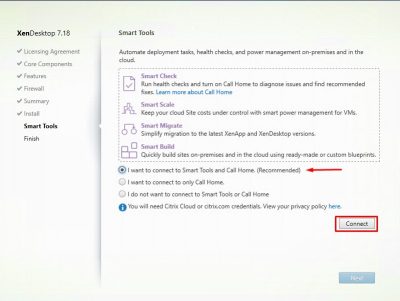
At the Smart Tools window you can select the option I want to connect to Smart Tools and Call Home. Click on the Connect button to sign in with your Citrix account. Of course you can select another option according to your needs.

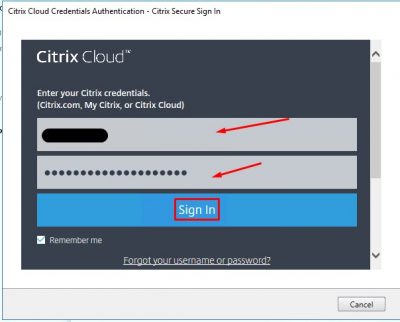
If you choose I want to connect to Smart Tools and Call Home you will have to supply your Citrix credentials. Then click on Sign In.

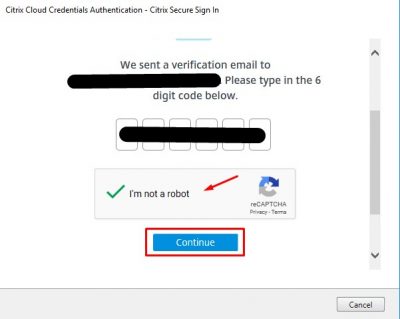
You will be prompted for a verification code. This code will be send to the email address associated with the Citrix account you entered. Fill in all the info and click on Continue.

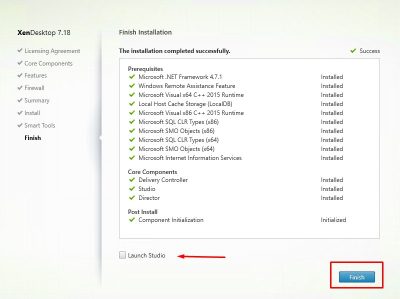
The installer will not continue. I choose to deselect the Launch Studio option. Click on Finish.

This concludes this blog post. Next up will be creating a XenDesktop site. Feel free to contact me of you have any questions or comments.

You can follow me on twitter or add the RSS feed from my blog and you will be notified when I add new posts.

Citrix XenDesktop 7.18 Delivery Controller installation Read More
Thin clients and HDX 3D Pro support demystified

Reading Time: 3 minutes

Recently I was presented with the following case. I was migrating from a Citrix XenDesktop 5.6 environment to a Citrix XenDesktop 7.6 environment. The new environment was running XenDesktop VDI’s with Windows 7 on Citrix XenServer. Because CAD and 3D application support was a requirement, the customer decided to use nVidia grid cards and use HDX 3D Pro.

Everything was running fine in the new XenDesktop 7.6 environment (server wise) and I started testing with thin clients which the customer already had. The thin clients did support HDX 3D Pro according to the manufacturer, so we were good to go. After logging in to the virtual desktop using said thin client, I got the little icon in the task bar telling me that HDX 3D Pro was enabled. But the desktop graphics performance was very poor. It was lagging, slow and was absolutely not fast in response. It felt a lot slower then the XenDesktop 5.6 environment.

Now after investigation I found that these thin clients did not support the H.264 codec fully. Using the HDX monitor I could see that they were using Deep Compression V2. But the cpu of the thin client was being hammered to the max when working on the XenDesktop 7.6 VDI.

The old XenDesktop 5.6 environment was running fine, but the graphics were off course Legacy mode. So the next step now was testing without the nVidia vGPU support in the VDI and enable Legacy mode graphics. That means disable vGPU support in the virtual machine in XenServer, disable desktop composition redirection and enable Legacymode graphics in the Citrix policies. Still the graphics performance was very poor, and HDX monitor showed me that Deep Compression V2 codec was still being used! I was not alone on this, searching the Citrix Forum resulted in:

Contacting Citrix support they eventually told me that I also had to reinstall the VDA agent in the virtual desktop and choose the option not to enable HDX 3D Pro support during installation. When this option is enabled during installation, it is not possible to use Legacymode graphics. This worked, the Windows 7 VDI reverted back to Legacymode graphics and the performance on the thin client was now very good.

So now the next step was to find out what thin client really supports HDX 3D Pro. Not partial support for the H.264 codec, but fully support it so we know for sure that Deep compression V2 codec performance would be good. I found out that manufacturers brand their thin clients with support for HDX 3D Pro or Citrix Certified or Citrix Ready, but they were unclear of the actual performance with HDX 3D Pro. Then I found some information which made clear what the HDX and Certified for Citrix should mean:

 HDX 3D Pro

Check out the website here. Ok, this makes sense. With this new information I started searching for thin clients which are HDX 3D Pro Verified and with this feature enabled. Searching the Citrix Ready Marketplace I found a list of thin clients which were fully certified for HDX 3D Pro! Check the list here. A few of them were already mentioned in a Citrix Forum post here (mentioned earlier).

So this is something that is a little bit of a grey area. Looks like thin clients enabled for HDX 3D Pro does not mean automatically a good performance in the VDI where HDX 3D Pro is a requirement. You have to test, make sure, and then re-test. Otherwise you and your customer will end up with very disappointing results, making you and Citrix look bad while it is the manufacturers of the thin clients who are to blame in not being utterly clear on what their product do support and what you can expect performance-wise (yes I am looking at you Dell).

This is my experience, and I could be wrong on this off course. What are your thoughts in this?

Thin clients and HDX 3D Pro support demystified Read More

Basic setup Citrix XenDesktop 7.6

Reading Time: 3 minutes

In this post I will show you how to do a basic installatoin of Citrix XenDesktop 7.6. I will be needing this to publish my desktops and applications. I will cover the configuration in another post, check back again for that. So for now let’s start the setup.

In this post I will show you how to:

  • Basic installation of XenDesktop 7.6

My lab setup:

  • Host running Citrix XenServer 6.5 SP1.
  • Windows 2012 R2 server with patches and updates which I will be using to install XenDesktop Delivery Controller.
  • Downloaded PVS ISO from www.citrix.com

Install Citrix XenDesktop 7.6

Using XenCenter mount the ISO on the Windows 2012 Server VM and start the setup. The setup will start. Click on Start in the XenDesktop option:

1xd76

Click on Delivery Controller to start the setup.

2xd76

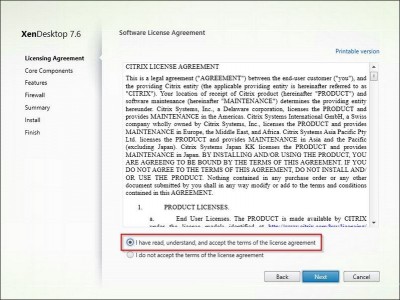
Accept the License Agreement. Click on Next.

3xd76

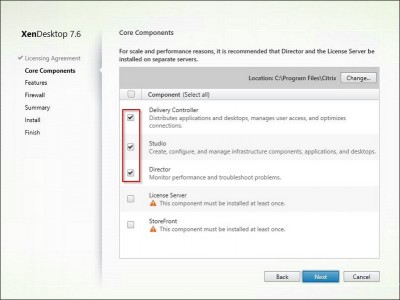
Select the components you want to install. I already have my setup license server. I will setup a dedicated StoreFront server, covered in another post. Click on Next.

4xd76

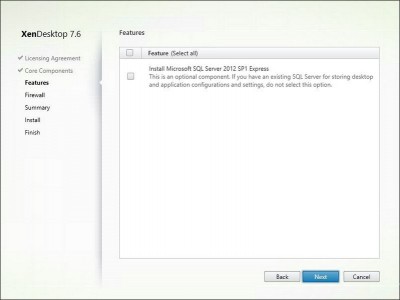
I have a dedicated MS SQL Server running, so I won’t install SQL Express. Click on Next.

5xd76

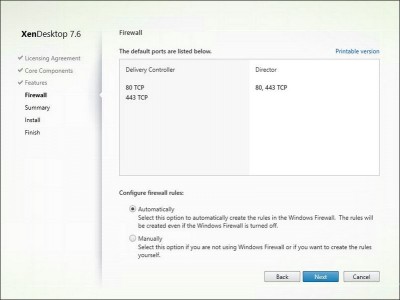
Check the firewall port configuration. I left this default. Click on Next.

6xd76

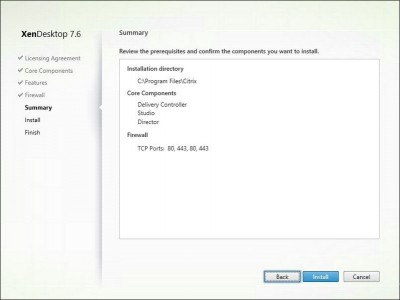
Check the summary window. Click on Install.

7xd76

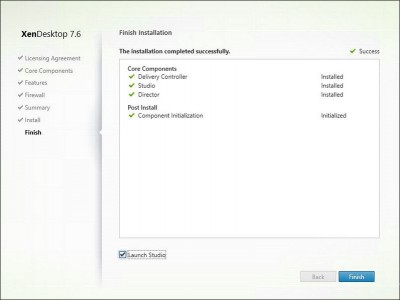
After the installation has finished you will get an overview. Click on Finish.

8xd76

Citrix Studio will launch and from here you can start by configuring your XenDesktop infrastructure. I will cover this in another post, so please check back soon.
You can also follow me on twitter or add the rss feed from the blog and you will be notified when I add new posts.

Basic setup Citrix XenDesktop 7.6 Read More