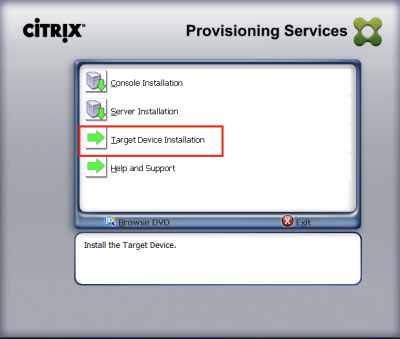
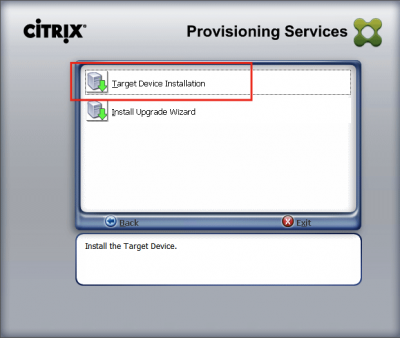
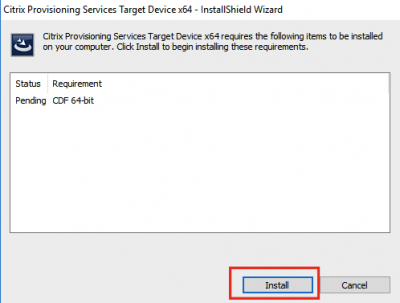
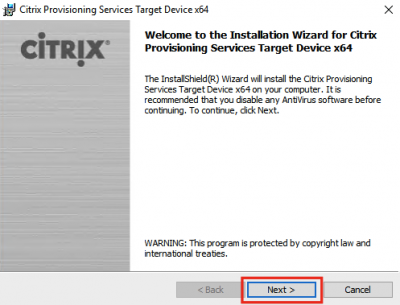
Setup and configuration of Citrix Provisioning Services 7.8

Reading Time: 6 minutes

Recently Citrix has released Citrix Provisioning Services 7.8 (PVS). I wanted to see how this works, so I decided to set it up in my homelab and share the setup and configuration steps with you guys.

I will be needing this component to stream my desktops and servers. Citrix Provisioning Services (PVS) eliminates the need to manage, update and patch individual systems. Instead it allows us to use a master image to provision computers. This master image (vDisk) can be used simultaneously by multiple computers.

In this post I will show you how to:

  • Install PVS
  • Basic configuration using the PVS wizard
  • Create a PVS farm

My lab setup:

  • Windows 2012 R2 server with patches and updates which I will be using to install PVS
  • Downloaded PVS ISO from www.citrix.com
  • Service Account in Active Directory
  • Local domain (vikash.nl)
  • Domain controller (dc01.vikash.nl)
  • Hypervisor Hyper-V 2012 R2
  • SQL server (sql01.vikash.nl)
  • Citrix License Server (dc01.vikash.nl)
  • All servers running as virtual machines

Install Citrix Provisioning Services 7.8

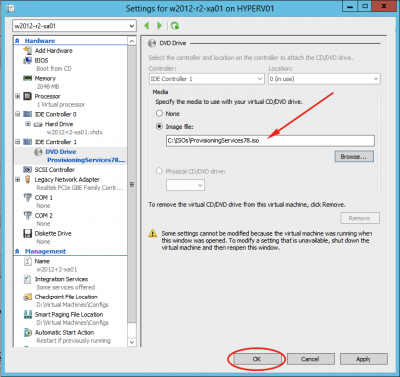
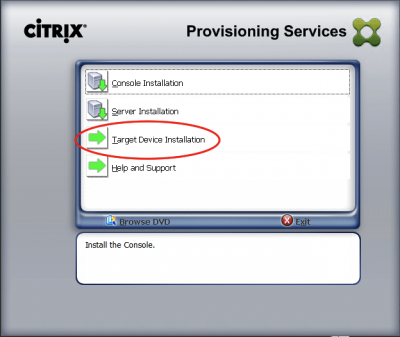
Mount the ISO to using Hyper-V manager on your virtual server and start the setup. Click on Server Installation.

pvs_78_01


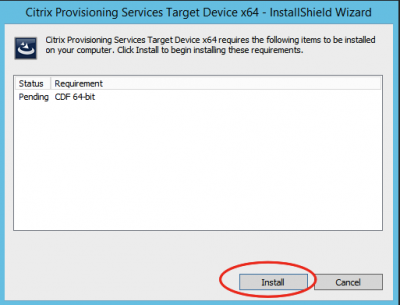
The setup wizard will automatically detect the required components and will prompt to install them. Click on Install.

pvs_78_02


Click on Yes to install the SQL components.

pvs_78_03


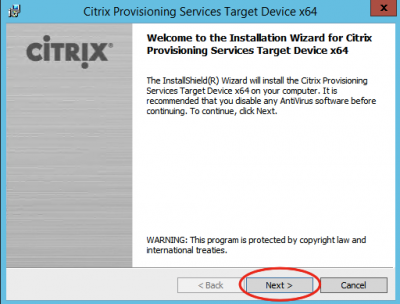
Click on Next on the welcome screen.

pvs_78_04


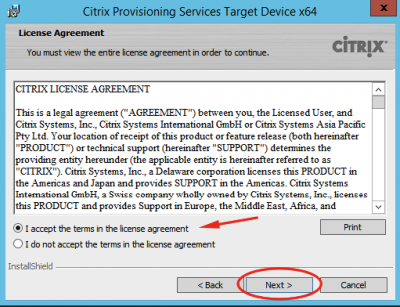
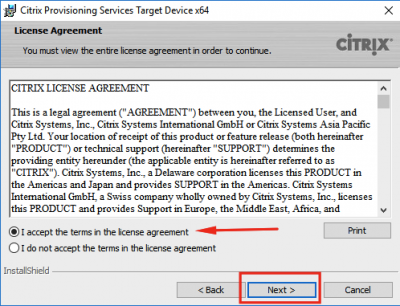
Accept the license agreement and click on Next.
pvs_78_05


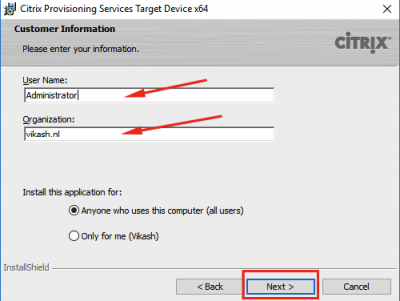
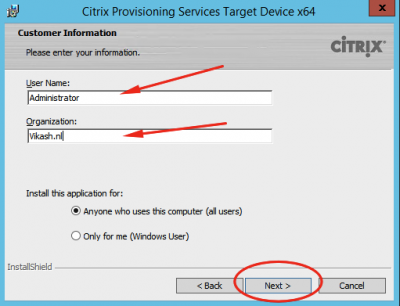
Enter the username and organization name. Select the all users option and click on Next.

pvs_78_06


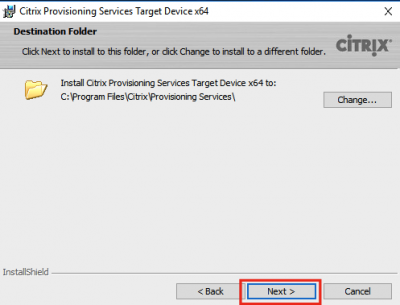
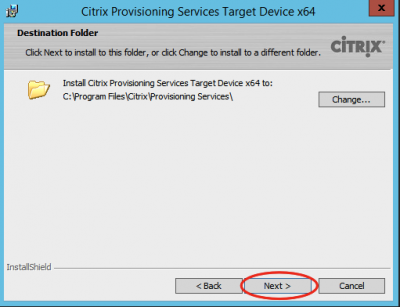
Choose the installation folder. In my case I left this default. Then click on Next.

pvs_78_07


Click on Install to start the installation.

pvs_78_08


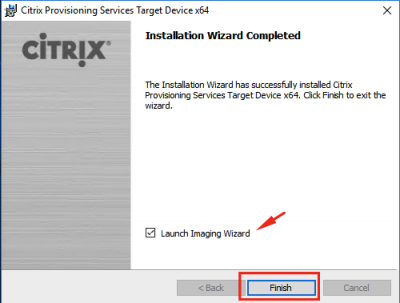
Click on Finish to finish the installation.

pvs_78_09


You will get a warning message about the PVS Console. We will install this later. Click on OK.

pvs_78_10


Now the Provisioning Services Configuration Wizard will automatically start. Click on Next.

pvs_78_11


You will now be prompted to choose a DHCP option. When the PVS server is running DHCP (local service), choose The service that runs on this computer. In my case my DHCP is running on my router, so I choose The service that runs on another computer. Click on Next.

pvs_78_12


Choose the PXE options. If your virtual machines will boot using the PXE service, enable this. In my environment I will be using a bootable ISO for all the virtual machines running from PVS. You can see  here how to create a bootable ISO. So I choose The service that runs on another computer and click on Next.

pvs_78_13


Now we have to create a new farm since this is my first PVS server. Choose Create farm and click on Next.

pvs_78_14


The wizard will create the database now. The active directory account running the configuration wizard should have rights to create the database on the SQL server. Otherwise make sure the database is created beforehand and that you have the correct account to login to the database. Enter the SQL fqdn and click on Next.

pvs_78_15


Enter the database name. If this is an existing database, choose the name using the dropdown menu. Make sure to select the correct Active Directory group to manage the PVS server (Farm Administrator group). Enter the other information needed to create the farm and click on Next.

pvs_78_16


Select the destination to store the virtual disks for the virtual machines running from PVS. Give it a name and click on Next.

pvs_78_17


Enter the license server fqdn. Click on Next.

pvs_78_18


Now we have to specify an account for running the PVS service. This will be used to run the Stream and Soap service. Enter the correct information and click on Next.

pvs_78_19


The target devices running from PVS cannot update their own password in the Active Directory, so we must enable PVS to do this for us. Make sure this is enabled and click on Next.

pvs_78_20


Check the network communication settings for management and streaming. Select the correct interface, check with your network admin in case this is not clear. In my case my PVS server has one NIC. Click on Next.

pvs_78_21


Next you will be prompted to enter the TFTP options. Enable it and click on Next.

pvs_78_22


Now everything is setup to finish the configuration wizard. Click on Finish.

pvs_78_23


If you have Windows Firewall running on your server, you will get a message about that. Make sure you disable it later or open the necessary ports. Click on OK.

pvs_78_24


Click on Done after the configuration wizard has finished.

pvs_78_25


Install the Citrix Provisioning Services Console

In order to manage Citrix Provisioning Services you need to install the console. Run the setup from the Citrix Provisioning Services ISO and this time click on Console Installation.

pvs_78_26


Click Next in the welcome screen.

pvs_78_27


Accept the License Agreement and click on Next.

pvs_78_28


Enter the Customer Information and click on Next.

pvs_78_29


Choose the installation path and click on Next.

pvs_78_30


Click on Install to begin the installation.

pvs_78_31


After the installation is finished, click on Finish.

pvs_78_32


Now go to the Start Menu and start the Provisioning Services Console.

pvs_78_33


Right click Provisioning Services Console and click on Connect to Farm….

pvs_78_34


Enter the correct fqdn, select Auto-login on application start or reconnect to automatically connect to the PVS server and then click on Connect.

pvs_78_35


Now you should be able to manage the PVS server.

pvs_78_36

This concludes this tutorial. Feel free to contact me of you have any questions or comments.

You can also follow me on twitter or add the rss feed from the blog and you will be notified when I add new posts.


Setup and configuration of Citrix Provisioning Services 7.8 Read More

How to setup and configure Citrix Licensing Server 11.13.1.2

Reading Time: 3 minutes

I already did a setup and installation of Citrix Licensing Server 11.12.1 here, but it is always nice to have a setup guide for a new version.

Adding a Citrix Licensing Server to your environment is important if you are going to setup and use Citrix products and solutions. So let me show you how to:

  • install the license server
  • configure the license server
  • add a license file to the license server

My environment for the installation:

  • downloaded the Citrix Licensing Server 11.13.1.2 (Build 16002) for Windows (www.citrix.com)
  • Windows 2012 R2
  • domain name: VIKASH (vikash.nl)
  • account for setup: Administrator (VIKASH\Administrator)

Installing Citrix Licensing Server 11.13.1.2

Unpack the .zip file and start the installer.

lSrv_11.13.1.2_01


You will be presented with the screen below. Accept the license agreement and click on Next.

lSrv_11.13.1.2_02


Choose your installation path and click on Next.

lSrv_11.13.1.2_03


Next you will be presented by the port for the Licensing Server. Change it as you prefer, just make sure that it doesn’t interfere with services using those same ports on your server. Click on Next and the installation will begin.

lSrv_11.13.1.2_04


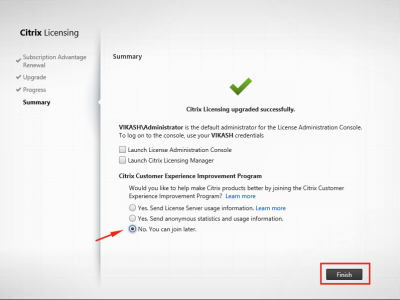
After the installation has finished, you will be presented with a summary screen. I selected the option not to participate in the Customer Experience Improvement Experience Program. Make your choice and click on Finish.

lSrv_11.13.1.2_05


Now it is time to upload your license. Go to the Start Menu and start the Citrix License Administration Console.

lSrv_11.13.1.2_06


Your default browser will open with the correct URL for the Citrix License Administration Console. Click on “Continue to this website” to move past the SSL warning. We can fix this later, for now it is not important. Your session will be encrypted using the SSL certificate installed with the Citrix Licensing Server anyway.

lSrv_11.13.1.2_07


Click on Administration.

lSrv_11.13.1.2_08


You will be prompted to log on. Use your Domain Administrator (or the user used to install the Citrix Licensing Server) to log on. Click on Submit.

lSrv_11.13.1.2_09


Click on Vendor Daemon Configuration in the menu on the left site. Then click on Import License.

lSrv_11.13.1.2_10


Now click on Browse to locate your license file. Then click on Import License.

lSrv_11.13.1.2_11


Click on OK after the import is finished.

lSrv_11.13.1.2_12


The Citrix Licensing Server will only read the imported licenses after a reboot, or after the Citrix Licensing Server has been restarted. Let’s restart the license server. In the Run dialogue box enter services.msc and click on OK.

lSrv_11.13.1.2_13


Locate the Citrix Licensing service, select it and click on the reboot icon in the menu.

lSrv_11.13.1.2_14


Now switch back to your browser and reload (or re-open) the Citrix License Manager Console and go to the Dashboard. Your licenses should now be visible.

lSrv_11.13.1.2_15

How to setup and configure Citrix Licensing Server 11.13.1.2 Read More

Apple Airport Extreme “disable” DHCP and keep NAT

Reading Time: 3 minutes

The Apple Airport Extreme is my home router and access point. Recently I wanted to use DHCP on my Synology NAS and disable it on the Airport Extreme. Guess what, when you disable DHCP on the Airport Extreme, it also disables NAT! Not what I had in mind. I am a fan of Apple products, and wanted to keep using the Airport Extreme for my WAN -> LAN connection (internet), because I am pleased with the performance and stability.

There are only three options to choose from:

  • DHCP and NAT (which I am using currently)
  • DHCP only
  • Off (Bridge Mode)

See the screenshot below:

airport_extreme_dhcp_01

None of the options suited my needs, so what I found out is that I can keep the DHCP and NAT option enabled, but deplete the DHCP servers IP address scope. So basically I am going to setup my DHCP server on the Airport Extreme with a scope of two IP addresses and then immediately reserve those ip’s with fake MAC addresses. This way the Airport Extreme will not be able to serve IP addresses in my network, and I can now setup another DHCP server to fit my needs. In another post I will explain why I need another DHCP server.

Let me walk you trough the procedure using the screenshots below.

First let’s start by opening the Airport Utility, select your Airport Extreme Base Station and click on Edit:

airport_extreme_dhcp_02

Then go to the Networking Tab and click on Network Options…:

airport_extreme_dhcp_03

Setup the DHCP scope according to the settings in the screenshot below. The IP address space on my LAN is 192.168.1.x. You can have another range, adjust it to your needs. So I basically setup a DHCP scope consisting of two IP addresses. When you’re done, click on Save.

airport_extreme_dhcp_04

Now we have to add the fake IP reservations. In the DHCP Reservations section click on the + sign.

airport_extreme_dhcp_05

I then add Dummy 1 and Dummy 2 clients using a fake MAC address. Click on Save

airport_extreme_dhcp_06

airport_extreme_dhcp_08

Now your Network tab should look something like this:

airport_extreme_dhcp_07

Click on Update and that’s it! DHCP is now “turned off” on the Airport Extreme, and you are free to use another DHCP server for more flexibility in your LAN.


Apple Airport Extreme “disable” DHCP and keep NAT Read More

Thin clients and HDX 3D Pro support demystified

Reading Time: 3 minutes

Recently I was presented with the following case. I was migrating from a Citrix XenDesktop 5.6 environment to a Citrix XenDesktop 7.6 environment. The new environment was running XenDesktop VDI’s with Windows 7 on Citrix XenServer. Because CAD and 3D application support was a requirement, the customer decided to use nVidia grid cards and use HDX 3D Pro.

Everything was running fine in the new XenDesktop 7.6 environment (server wise) and I started testing with thin clients which the customer already had. The thin clients did support HDX 3D Pro according to the manufacturer, so we were good to go. After logging in to the virtual desktop using said thin client, I got the little icon in the task bar telling me that HDX 3D Pro was enabled. But the desktop graphics performance was very poor. It was lagging, slow and was absolutely not fast in response. It felt a lot slower then the XenDesktop 5.6 environment.

Now after investigation I found that these thin clients did not support the H.264 codec fully. Using the HDX monitor I could see that they were using Deep Compression V2. But the cpu of the thin client was being hammered to the max when working on the XenDesktop 7.6 VDI.

The old XenDesktop 5.6 environment was running fine, but the graphics were off course Legacy mode. So the next step now was testing without the nVidia vGPU support in the VDI and enable Legacy mode graphics. That means disable vGPU support in the virtual machine in XenServer, disable desktop composition redirection and enable Legacymode graphics in the Citrix policies. Still the graphics performance was very poor, and HDX monitor showed me that Deep Compression V2 codec was still being used! I was not alone on this, searching the Citrix Forum resulted in:

Contacting Citrix support they eventually told me that I also had to reinstall the VDA agent in the virtual desktop and choose the option not to enable HDX 3D Pro support during installation. When this option is enabled during installation, it is not possible to use Legacymode graphics. This worked, the Windows 7 VDI reverted back to Legacymode graphics and the performance on the thin client was now very good.

So now the next step was to find out what thin client really supports HDX 3D Pro. Not partial support for the H.264 codec, but fully support it so we know for sure that Deep compression V2 codec performance would be good. I found out that manufacturers brand their thin clients with support for HDX 3D Pro or Citrix Certified or Citrix Ready, but they were unclear of the actual performance with HDX 3D Pro. Then I found some information which made clear what the HDX and Certified for Citrix should mean:

 HDX 3D Pro

Check out the website here. Ok, this makes sense. With this new information I started searching for thin clients which are HDX 3D Pro Verified and with this feature enabled. Searching the Citrix Ready Marketplace I found a list of thin clients which were fully certified for HDX 3D Pro! Check the list here. A few of them were already mentioned in a Citrix Forum post here (mentioned earlier).

So this is something that is a little bit of a grey area. Looks like thin clients enabled for HDX 3D Pro does not mean automatically a good performance in the VDI where HDX 3D Pro is a requirement. You have to test, make sure, and then re-test. Otherwise you and your customer will end up with very disappointing results, making you and Citrix look bad while it is the manufacturers of the thin clients who are to blame in not being utterly clear on what their product do support and what you can expect performance-wise (yes I am looking at you Dell).

This is my experience, and I could be wrong on this off course. What are your thoughts in this?

Thin clients and HDX 3D Pro support demystified Read More

Basic setup Citrix StoreFront 3.0

Reading Time: 5 minutes

In this blogpost I will show the basic setup of Citrix StoreFront 3.0. StoreFront is the component for making your published desktops and published app available for your end-users.

A few new features of Citrix StoreFront 3.0:

  • unified user experience
  • improved customisation
  • loopback communications (no more host file editing)
  • treating published desktops as published apps
  • delegate authentication to backend servers

My environment for this basic setup:

  • Windows 2012 R2 (sf01.vikash.nl)
  • Citrix StoreFront 3.0 setup (www.citrix.com)
  • SSL certificate (storefront.vikash.nl) using own CA infrastructure (dc01.vikash.nl)
  • Citrix XenDesktop 7.6 Controller (xddc01.vikash.nl)

Before we can proceed with the installation we need a SSL certificate. For lab purposes I have installed a internal CA (my domain controller) and requested a domain certificate. Using Internet Information Services Manager on my StoreFront server I requested a domain certificate.

Make sure that you request a proper SSL certificate for production environments! Contact me if you have any questions regarding SSL certificates in production environments.

SSL Certificate request:

Open IIS Manager and click on create Domain Certificate:
sf3.0-setup-8

Fill in the required information and click on Next:
sf3.0-setup-9

Select the appropriate CA and set a friendly name for the certificate. Click on Finish:
sf3.0-setup-10

We now have to bind this certificate to the Default Web Site on your Citrix StoreFront server. In my case this is sf01.vikash.nl. Start IIS Manager, expand Sites and click on Default Web Site. Then click on Bindings:
sf3.0-setup-11

Click on Add:
sf3.0-setup-12

Select https as Type and select the SSL certificate we just requested. Click then on OK:
sf3.0-setup-13

Now we can see that SSL is enabled for the Default Web Site. Click on Close:
sf3.0-setup-14

Now you can test the certificate by browsing to the default website of the StoreFront server:
sf3.0-setup-30

If everything went well you should see no errors in your browser when requesting the page using https.

Installing Citrix StoreFront 3.0:

Start the setup by double-clicking on CitrixStoreFront-x64.exe. Setup wil now start:
sf3.0-setup-1

Accept the license agreement and click on Next:
sf3.0-setup-2

The setup will install the required Windows Features and Roles. Review and click on Next:
sf3.0-setup-3

Setup is now ready for install. Click on Install:
sf3.0-setup-4

Installation in progress. Grab a coffee:
sf3.0-setup-5

Click on Finish after installation of all the components:
sf3.0-setup-6

Citrix StoreFront will automatically open and you will be presented with the Welcome to StoreFront screen. From here we can start the basic configuration of StoreFront:
sf3.0-setup-7

Basic setup of Citrix StoreFront 3.0:

Click on Create a new Deployment:
sf3.0-setup-15

Enter your Base URL. In my case it is https://storefront.vikash.nl. Click on Next:
sf3.0-setup-16

Enter the Store name. In my case it is Vikash. Click on Next:
sf3.0-setup-17

Now we have to specify Delivery Controllers so StoreFront knows where to get published apps or desktops. This is your XenDesktop or XenApp controller. Click on Add:
sf3.0-setup-18

Enter a name for the Display name and set the correct Transport type, in my case it’s http. Make sure you select the correct version of XenDesktop of XenApp. Click on Add:
sf3.0-setup-19

Enter the hostname of the controller and click on OK:
sf3.0-setup-20

As you can see the controller has been added. Click on OK:
sf3.0-setup-21

Click on Next:
sf3.0-setup-22

Leave the defaults (None) on the Remote Access page and click on Create:
sf3.0-setup-23

Click on Finish:
sf3.0-setup-24

Now click on Authentication in the left panel and click on Configure Trusted Domains. By adding trusted domains the user can only set their username when logging in. This options also allows us to add multiple domain names as trusted domains and allow the user to select the appropriate one when logging in.
sf3.0-setup-28

For now we have only have one domain. Select the Trusted domains only option, click on Add and enter the domain name (vikash.nl). Then click on OK:
sf3.0-setup-29

Now click on Receiver for Web in the left panel and locate the Website URL. Time for some testing!sf3.0-setup-31

I will login using my test user (test01) from a virtual machine which is joined in my domain, so my SSL certificate will be trusted. Open the URL in a browser and enter the test user credentials:
sf3.0-setup-32

The user is successfully logged in. I don’t have published apps or desktops yet. I show that in another blogpost. For now we have a working Citrix StoreFront 3.0 environment, ready for further testing.
sf3.0-setup-33

You can also follow me on twitter or add the rss feed from the blog and you will be notified when I add new posts. If you have any questions feel free to contact me.

Basic setup Citrix StoreFront 3.0 Read More

Basic setup Citrix Provisioning Services 7.6

Reading Time: 6 minutes

So I got some free time now to continue setting up my homelab. I decided to start with a basic setup and configuration of Citrix Provisioning Services 7.6 (PVS). I will be needing this component to stream my desktops and servers. Citrix Provisioning Services (PVS) eliminates the need to manage, update and patch individual systems. Instead it allows us to use a master image to provision computers. This master image (vDisk) can be used simultaneously by multiple computers.

In this post I will show you how to:

  • Install PVS
  • Basic configuration using the PVS wizard
  • Creating a farm

My lab setup:

  • Host running Citrix XenServer 6.5 SP1
  • Windows 2012 R2 server with patches and updates which I will be using to install PVS
  • Downloaded PVS ISO from www.citrix.com
  • Service Account in Active Directory

Install Citrix Provisioning Services 7.6

Using XenCenter mount the ISO on the Windows 2012 Server VM and start the setup. The setup will start. Click on Server Installation.

0_pvs_76_install

If there are additional items to be installed, you will be prompted for them. Click on Install.

1_pvs_76_install

Click on YES.

2_pvs_76_install

Click on Next.

3_pvs_76_install

Accept the License Agreement and click on Next.

4_pvs_76_install

Enter your customer information in the User Name field and the Organization field. Select the option you need for “Install this application for”. Click Next.

5_pvs_76_install

Select the installation folder. In my case I left it default. Click Next.

6_pvs_76_install

Then click on Install to begin the installation.

7_pvs_76_install

Click on Finish the start the configuration wizard.

8_pvs_76_install

You will get a warning about the PVS console not detected on your system. Just click on OK, we will deal with this later.

9_pvs_76_install

The configuration wizards start, click on Next to begin configuration.

10_pvs_76_install

Configure the DHCP options according to your infrastructure. I have selected the option “The service that runs on another server”. Select this option is you have a separate DHCP server installed. Click on Next.

11_pvs_76_install

For the PXE services I have selected “The service that runs on another computer”. This is the scenario I see in most of the cases with customers running PVS. In many cases they have a seperate PXE server running for Thin-Clients. Select the option you see fit for your infrastructure. Click on Next.

12_pvs_76_install

Now we have to create the PVS farm. In another post I will cover the “Join existing farm” option. For now let’s create a new one. Click on Next.

13_pvs_76_install

Enter the information to setup the PVS database on the SQL server. Select the appropriate instance, otherwise leave blank. Click on Next.

14_pvs_76_install

In the New Farm windows enter the information according to your company/infrastructure. It will already suggest the database name. You can change it, or select the appropriate database. I also added the Active Directory Administrators group. Click on Next.

15_pvs_76_install

Enter the Store name and the path where you vDisks will be stored. Click on Next.

16_pvs_76_install

Enter the hostname or ipadress of you licensen server. I also checked the option “Validate license server version and communication”.  Click on Next.

17_pvs_76_install

Enter the service account you created in Active Directory to setup the Stream and Soap services. This service account will also be used to setup the database. Note that this user must have db_writer and db_reader access, so I made this account the owner of the PVS database. Click on Next.

19_pvs_76_install

I use the default to update the computer password in the Active Directory. Click on Next.

20_pvs_76_install

Select the network card for management and streaming, in my case there is only one. Check the communication ports. I left them default. Click on Next.

21_pvs_76_install

I choose not to install TFTP server, as I will be booting using an ISO. This ISO tells my client device (target) where my PVS server is. I will cover this in a later post. Click on Next.

22_pvs_76_install

Check the information on the overview screen. Click on Finish.

23_pvs_76_install

You will get a notification about the firewall. Click on OK.

24_pvs_76_install

Now wait for the wizard to complete the configuration. It should end with all the green checkmarks. Click on Done.

25_pvs_76_install

Install Provisioning Services Management Console

Now we need to install the PVS Console for management purpose. This console can be installed on a remote server (like a management server). I choose to install this on my local PVS server.

Start the setup from the Provisioning Services installation ISO. Click on Console Installation.

26_pvs_76_install

Click on Next in the Welcome screen.

27_pvs_76_install

Accept the license agreement. Click on Next.

28_pvs_76_install

Enter your customer information in the User Name field and the Organization field. Select the option you need for “Install this application for”. Click Next.

29_pvs_76_install

Choose the installation folder. I left mine default. Click on Next.

30_pvs_76_install

Select the setup type. Click on Next.

31_pvs_76_install

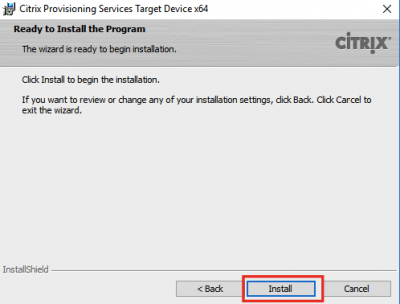
We are now ready to install. Click on Install.
32_pvs_76_install

Click on Finish.

33_pvs_76_install

Start the PVS console and enter the information of the PVS server. Click on Connect.

34_pvs_76_install

We now have a working Provisioning Services server. In another post I will show you how to create and configure master images using Provisioning Services.
You can also follow me on twitter or add the rss feed from the blog and you will be notified when I add new posts. If you have any questions feel free to contact me.
Basic setup Citrix Provisioning Services 7.6 Read More