Blog

How to setup and configure Citrix Licensing Server 11.15

Reading Time: 4 minutes

I already did an installation and configuration of previous versions of Citrix License Server. Now that I am active again on my blog it is time to set up my homelab. In the past I had my homelab running on Hyper-V 2016 and to be honest I was not a fan ot it. Constantly having to updating the operating system, performance issues and lack of flexibility were driving me mad. But I had no choice as the hardware I was running my homelab on only supported Windows. Now I have new hardware for my homelab and I made sure it was compatible with VMware ESXi!

So I have to start from the basics and one of the basics is Citrix License Server. Let’s start.

My environment:

  • Citrix Licensing Server 11.15 (Build 24100) for Windows (www.citrix.com);
  • Windows 2016;
  • Domain name: vikash.nl;
  • Account for setup: Administrator (VIKASH\Administrator).

Installing License Server 11.15

Unpack the zip file and double click CitrixLicensing.exe.

You will be presented with the screen below. Accept the license agreement and click on Next.

Select the directory to install Citrix License Server. Click then on Next.

Make sure the box to configure the firewall is checked. You can change the ports if you need to. Also not in this screen the wizard is telling you what account will be automatically added to manage the server. Take notes. After you made your changes click on Next.

Select the option that matches your contract. Click on Install to start the installation.

The wizard completes the installation. Click on Finish.

Add licenses to Citrix License Server

Now that we have the license server running it is time to add some licenses. Go to the Start menu and click on Citrix License Administration Console.

Internet Explorer will now open and prompt you with a certificate warning. This is because the default certificate for Citrix License Server is a self-singed certificate. You can click on Continue to this website. Note the URL to access this console.

You will be presented with the dashboard of the administration console. As you can see there are no licenses yet for Citrix products.

Login on the Citrix website and go to licenses. Click on Allocate to allocate a license and download it to your desktop.

Return to the Citrix License Administration Console and click on Administration to login. Use the account you used to install the license server. Click then on Submit.

Now we have to upload the license file we downloaded from the Citrix license portal. Click on Vendor Deamon Configuration and then on Import License.

Select the license file and click on Import.

Click on OK.

For the license to be active you have to restart the server or the Citrix Licensing service.

Now return to the dashboard of the Citrix License Administration Console and the licenses you just added should be visible.

So that’s it. Thanks for reading.

This concludes this tutorial. Feel free to contact me of you have any questions or comments. You can also follow me on twitter or add the rss feed from the blog and you will be notified when I add new posts.

How to setup and configure Citrix Licensing Server 11.15 Read More

Get this blog alive!

Reading Time: < 1 minute


So after a very long time I am back and active again! What have I been doing all this time? Let me tell you.

As many of you guys know I work as a senior consultant in the IT branch. So I have been doing that for the last ten years or so. A few years ago I decided to study at a university of applied sciences in order to take my career to the next level. So I started three and a half years ago and during the past six months I have been busy with my thesis. Not so long ago I graduated as BBA (yay!) and now I can finally move forward in my career and also my blog! In the coming period you can regularly expect new technical articles here. Follow my blog using RSS, twitter or facebook.

Regards,
Vikash

Get this blog alive! Read More

Copy NetScaler configuration and change all the IPs

Table of Contents

Reading Time: 6 minutes

Copy NetScaler configuration and change all the IPs is something you will have to do eventually when Citrix NetScaler is your playing field. Some customer will ask you to copy a running configuration to a new NetScaler, because they are redesigning the network or they need an exact replica of the production NetScaler for testing purposes. So you will have to move the configuration to a new NetScaler and change the IP addresses to match the new network situation. This can be done in a several ways, but in this post I will show you how I do it. Because when you have have little time and is has to be done in a fast and reliable way, I believe this is the way to go. Let me show you how in this post.

Deliverables of this post:

  • Copy a running (production) NetScaler config to another NetScaler.
  • Change the NetScaler IP (NSIP), Subnet IP (SNIP) and Virtual IP (VIP).

Requirements for the configuration:

  • Same version and build on every NetScaler (www.citrix.com).
  • NetScaler License (same license type on both appliances).
  • Ip addresses for the new NetScaler (NSIP, SNIP and VIP).

The steps in this post require you having extended knowledge of NetScaler command prompt (SSH). It is very important you understand what is going on in the ns.conf file. This is the file where all the configuration of the NetScaler is stored. If you mess up this file, you will have to restore it from a backup. Furthermore make sure that your old and new NetScaler is running the same version and build.

Below is an overview of the old and the new IP addresses I am using in my network.

DescriptionNS01 (old NetScaler)NS02 (new NetScaler)
NetScaler IP192.168.1.30192.168.1.40
Subnet IP192.168.1.31192.168.1.41
Virtual IP192.168.1.32192.168.1.42
Virtual IP192.168.1.33192.168.1.43
Virtual IP192.168.1.34192.168.1.44
Virtual IP192.168.1.35192.168.1.45

In my homelab setup I don’t have a High Availability (HA) NetScaler configured. If you need an HA pair in your new setup, just follow the steps in this post for only one new NetScaler. When everything is copied and running on the new NetScaler, just add the second NetScaler, create your HA pair, and everything should sync fine.

Setup and configure your new NetScaler

We will start with the setup and configuration of the new NetScaler. The following things need to be setup on the new NetScaler:

  • NSIP
  • SNIP
  • DNS / TimeZone
  • License

Start you new NetScaler virtual machine and enter the initial setup information.

Log into your NetScaler to start the setup wizard. Choose your option on the Citrix User Experience Improvement Program.

Click on Subnet IP Address. Enter the IP and click on Done.

Click on Host Name, DNS IP Address and Time Zone.

Enter the information, select the time zone and click on Done.

The NetScaler will reboot now to apply the changes. Click on Yes.

After the reboot log into the NetScaler management and click on Licenses.

Allocate your NetScaler license using you Citrix account. The license needs to be allocated using the system ID, displayed on the right side. Select Upload license files and click on Browse to select the license file you have allocated.

After the license file is imported successfully, click on Reboot.

After the reboot log into the NetScaler management. You will be presented with an overview of the features activated by your license. Now you can see the model number according to your license. Close the License overview window.

Copy certificate files to the new NetScaler

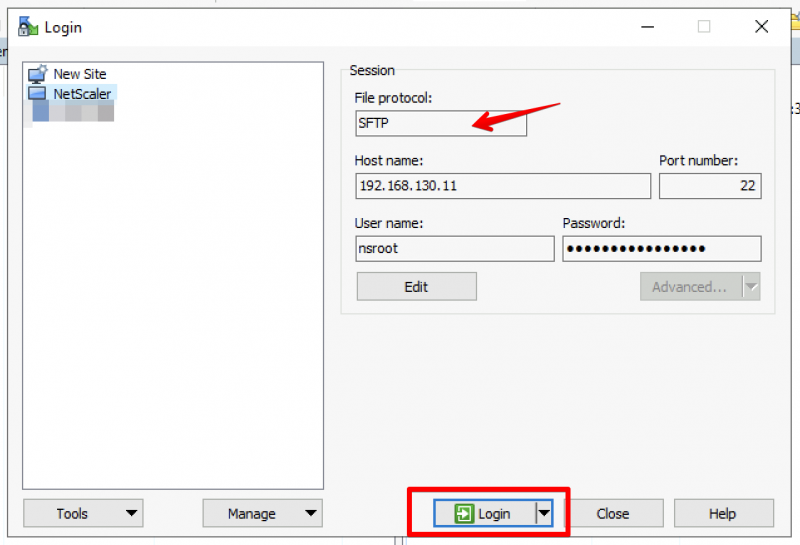
The next step is to make sure all your certificates are available on the new NetScaler. For this I will be using WinSCP. Using the Secure File Transport Protocol (SFTP) option in WinSCP I can easily copy files from the NetScaler. Feel free to use your favorite editor or tool to connect to the NetScaler to get the files.

Get the certificates from your old NetScaler. Log into the NetScaler using WinSCP and browse to /flash/nsconfig. Select the ssl directory and download it to your computer.

Upload the certificates in the ssl directory to your new NetScaler. Log into the new NetScaler and browse to /flash/nsconfig/ssl. Select the certificates you downloaded in the previous step and upload them to this directory.

Check the directory and click OK.

Select Yes to All to confirm overwriting existing certificates on your new NetScaler.

So now the certificates from your old NetScaler should be available on the new one.

Download NetScaler configuration file from old NetScaler

Using WinSCP go back to your old NetScaler and get the ns.conf file. This is the file where all the configuration is stored and we will modify and import this on the new NetScaler.

Start by saving your configuration to make sure that everything is written to the ns.conf. Browse to /flash/nsconfig and select the ns.conf. Then click on Download.

Prepare NetScaler configuration file

We have to modify the ns.conf file before we can import it on the new NetScaler. Rename the file in WinSCP.

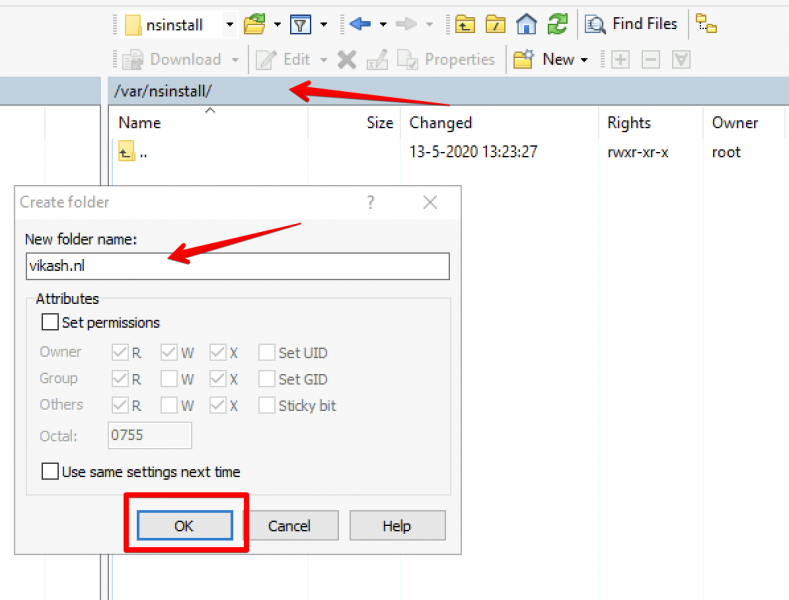
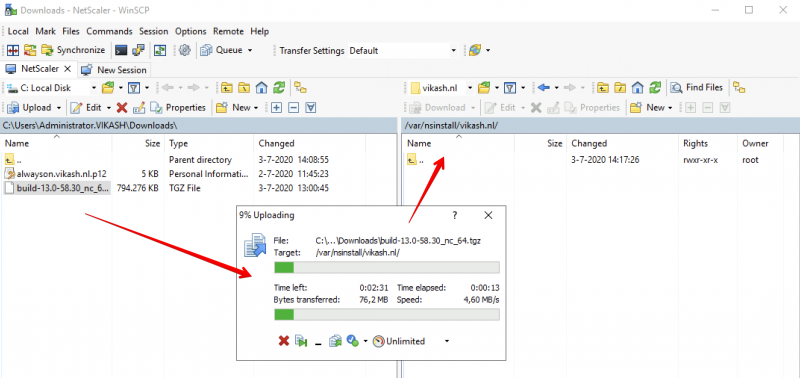
Upload the renamed file to your new NetScaler in the directory /var/tmp. This is the directory we will use to import the file later.

With the renamed ns.conf uploaded to the new NetScaler, it is time to edit it. Right-click the file and click on Edit -> Internal Editor in WinSCP.

We have to anonymize this file for the new NetScaler, so every object here which is bound to the old NetScaler we have to delete. Let’s remove at least the following lines in this file:

  • set ns config -IPAddress
  • set lacp
  • set ns hostname
  • add route (all of the routes)
  • set system user nsroot
  • set interface (all of them)
  • add ns ip6

The next step is to replace the IP addresses for the SNIP and the VIP with the new ones. Just scroll do the file and change them, or use find and replace in your editor. Then save the file.

Import the configuration on your new NetScaler

Now we can import the file in the new NetScaler. Log into your new NetScaler (web) and navigate to System -> Diagnostics. Then click on Batch configuration.

Click on Choose File and then on Appliance.

Select the file we edited and prepared for import in the steps above. Click on Open.

Click then on Run to start the import.

The import will start.

When the import is finished you will see a message that a system reboot is needed. Click on Stop.

Go to System and click on Reboot.

Make sure Save configuration is checked and click on OK.

After the reboot login to your NetScaler.

Check the IP addresses. Go to System -> Network -> IPs -> IPV4s. The list should show you only the new IP addresses.

This concludes this blog post. Feel free to contact me of you have any questions or comments.

You can follow me on twitter or add the RSS feed from my blog and you will be notified when I add new posts.

Copy NetScaler configuration and change all the IPs Read More

Setup Azure MFA User Portal for Self Service

Table of Contents

Reading Time: 7 minutes

Setup Azure MFA user portal for self service is the next step, after setting up Azure MFA Server. Using the user portal, users can enroll and maintain their account. They will demand less support from your support team or admins. User will be able to change their PIN, change security questions, change phone number, enroll for the app, choose authentication methods, etc. The user portal runs on Internet Information Services (IIS), it’s a website.

Deliverables of this post:

  • Setup Azure MFA User Portal.

Requirements for the configuration:

  • Windows 2016 Server running IIS and MFA Server.
  • Azure subscription.
  • Valid SSL certificate.
  • Active Directory for user authentication.
  • A hostname for the MFA Server, in my case https://mfa.vikash.nl. This must match your SSL certificate.

MFA User Portal has a lot of options and features. In this blog I will only show a few. Check your requirements and enable features accordingly. In my homelab I have MFA Server and the User Portal running on the same Windows Server.

Setup IIS for MFA User Portal

I will start by configuring IIS to make sure that deploying the user portal goes smooth later on.

Start IIS Manager, click on Application Pools and select the DefaultPool. Then click on Basic Settings in the right column.

Change the .NET CLR version to v2.0.50727. Then select Classic in Managed pipeline mode. Click on OK.

Now select Default Web Site and select Bindings in the right column.

Click on Add.

Select https and then your SSL certificate for the website. Make sure that this is the certificate with the correct DNS hostname for your MFA Server. Click then on OK.

Check then the binding is correct and click on Close.

Install Web Service SDK

Now go back to your MFA Server interface and select Web Service SDK. Then click on Install Web Service SDK.

Click on Next.

Click again on Next to continue.

Keep the defaults and click on Next.

After the installation finishes, click on Close.

\

Start IIS manager and select MultiFactorAuthWebServiceSdk and click on Authentication.

Disable Anonymous Authentication.

Setup and configure the User Portal

Now it is time to install and configure the user portal. Go to the User Portal and select the options you want to enable for your users. Then click on Install User Portal.

Select the defaults and click on Next.

After installation finishes click on Close.

Let’s test if this is working. Open a browser and go to https://<ExternalFQDN>/MultiFactorAuth/. In my case this is https://mfa.vikash.nl/MultiFactorAuth. You should see the MFA User Portal Log In page.

Setup and configure the Mobile Portal

The interface doesn’t have a option to install the Mobile Portal. We need to locate the installer in the folder C:\Program Files\Multi-Factor Authentication Server. Select the file MultiFactorAuthenticationMobileAppWebServiceSetup64.msi. 

Start the installer and accept the defaults. Click on Next.

After the installer finishes, click on Close.

Now we have to make sure that the MFA Server knows what the Mobile App Web Service URL is. Go to Mobile App and enter the URL: https://<ExternalFQDN>/MultiFactorAuthMobileAppWebService. In my case this is https://mfa.vikash.nl/MultiFactorAuthMobileAppWebService. The Account name can be anything you like.

Configure Service Account

The User Portal installer creates an Active Directory group. The name is: PhoneFactor Admins. Let’s create an account and use is as an service account.

Open Server Manager. Click on Tools and then Active Directory Administrative Center.

I have a specific container Service Accounts. Select the container where you want to create your service account and then click on New -> User in the right column.

Enter the details according to your requirements. Make sure to set the Password options to Never expires. Then click on Member Of.

Click on Add.

Find the PhoneFactor Admins group and click on OK.

Then click on OK.

Configure Service Account for Application Pool

Next step is to configure the different components of Azure MFA User Portal to use the service account we just created.

Go to IIS manager, select Application Pools then click on MultifactorAuthWebServiceSdk application pool. Then click on Advanced Settings in the right column.

Under Process Model select Identity. Click on the button with the 3 dots.

Select Custom account and click on Set.

Enter the credentials of the service account you created and click on OK.

Make sure the service account is selected and click on OK.

Make sure the service account is selected now and click on OK.

Configure Service Account for Mobile Portal

Now we have to configure the Mobile Portal to use the service account. This has to be done in the config file.

Run Notepad as Administrator. Open the web.config file located in C:\inetpub\wwwroot\MultiFactorAuthMobileAppWebService.

Locate the section appSettings section. Change the value of WEB_SERVICE_SDK_AUTHENTICATION_USERNAME  and WEB_SERVICE_SDK_AUTHENTICATION_PASSWORD to match the information of your service account.

And as long we are here in this file locate the section applicationSettings. Change the value there to match you ExternalFQDN. In my case that is https://mfa.vikash.nl/MultiFactorAuthWebServiceSdk/PfWsSdk.asmx. Then save the config file.

Do some testing

Now we can do some testing and see of the service account is fine for the Mobile Portal. Open a browser on your MFA Server and navigate to https://localhost/MultiFactorAuthMobileAppWebService. Click on Continue if you get the certificate error. Then click on TestPfWsSdkConnection.

Click on Invoke to start the test.

You should see the Success value if everything is correct.

Go back to https://localhost/MultiFactorAuthMobileAppWebService. Click on Continue if you get the certificate error. Then click on TestSecurity.

Click on Invoke to start the test.

If everything is fine it should return te value secure.

Configure Service Account for User Portal

Now we have to configure the User Portal to use the service account. This has to be done in the config file.

Run Notepad as Administrator. Open the Web.Config file located in C:\inetpub\wwwroot\MultiFactorAuth.

Locate the section appSettings section. Change the value of USE_WEB_SERVICE_SDK to true.Then change the value of WEB_SERVICE_SDK_AUTHENTICATION_USERNAME  and WEB_SERVICE_SDK_AUTHENTICATION_PASSWORD to match the information of your service account.

Then scroll down and locate the section applicationSettings. Change the value there to match your ExternalFQDN. In my case this is https://mfa.vikash.nl/MultiFactorAuthWebServiceSdk/PfWsSdk.asmx.

Test MFA User Portal

After setting everything up it is now time to test the whole setup. Open a browser and navigate to your MFA User Portal. Remember to access it on the ExternalFQDN. In my case that is https://mfa.vikash.nl/MultiFactorAuth/. Enter the username and password for a user which is enabled for MFA. The click on Log In.

Azure MFA will call the user. Answer it.

Then click on the # key to accept the authentication request.

Now you can activate the mobile app with the correct information. Click on Activate Mobile App and then click on Generate Activation Code

You will now be presented with the activation page and the correct URL to activate the mobile app.

This concludes this blog post. Feel free to contact me of you have any questions or comments.

You can follow me on twitter or add the RSS feed from my blog and you will be notified when I add new posts.

Setup Azure MFA User Portal for Self Service Read More

Azure Multi-Factor Authentication Server with Citrix NetScaler

Table of Contents

Reading Time: 8 minutes

Azure Multi-Factor Authentication Server with Citrix NetScaler can be very powerful in protecting your infrastructure. NetScaler can use LDAP (or Active Directory) to authenticate users, but to add an extra layer of security we can use Multi-Factor Authentication (MFA). The user will receive a notification in the Microsoft Authenticator app, or a phone call from Azure, when trying to log into for example NetScaler Gateway, after entering their username and password. NetScaler will authenticate the user using Azure and MFA Server.

In this blog I will show you how this can be done. On my NetScaler I have setup full SSL VPN, and will configure the virtual server to authenticate using Azure MFA. I have setup a dedicated Windows 2016 Server on-premise to run MFA Server. On premise MFA Server is the choice if you want to secure VPN’s, IIS based web applications or other on premise applications using LDAP or RADIUS authentication.

Deliverables of this post:

  • Citrix NetScaler SSL VPN using MFA authentication.
  • Setup MFA Server on premise.

Requirements for the configuration:

  • Citrix NetScaler 11.1 (www.citrix.com).
  • Windows 2016 Server.
  • Azure subscription.
  • SSL VPN already configured on NetScaler (see this post).
  • Valid SSL certificate.
  • Active Directory for user authentication.
  • A hostname for the MFA Server, in my case https://mfa.vikash.nl. This must match your SSL certificate.

Setup Azure Active Directory

We have to link our on premise active directory to Azure AD, and sync the users to Azure. So we start by setting up Azure Active Directory. Log into Azure Classic Portal: https://manage.windowsazure.com.

Log into Azure classic portal and navigate to Active Directory in the left column. Click on MULTI-FACTOR AUTH PROVIDERS and then click on CREATE A NEW MULTI-FACTOR AUTHENTICATION PROVIDER.

Give it a name, select the usage model and click CREATE.

Select the provider you just created, and click on MANAGE on the bottom of the page.

A new browser window will open, and you will be redirected to the Azure Multi-Factor Authentication website to download the MFA Server software. Click on DOWNLOADS.

Then click on Download to start the download. Save the setup file on your Windows Server where you want to install the MFA Server software. Leave this page open.

Setup MFA Server

Switch to your Windows Server and start the installation of MFA Server. It will install some runtime libraries, click on Install.

Click on Next.

Click on Finish after the installation is complete.

The Configuration Wizard starts. Select the checkbox Skip using the Authentication Configuration Wizard. We will configure MFA manually. Click then on Next.

Activate MFA Server

Now we have to link and authenticate our new MFA Server to Azure MFA. Go back to the Downloads Server page, and click on Generate New Activation Credentials. They are only valid for 10 minutes.

Go back to your MFA Server, where you will be prompted to activate the MFA Server. Enter the Email and Password you got in the step above, and click on Activate.

Click on OK on the Join Group window.

Click on No when asked of you want to run the wizard.

You will see the status of your MFA Server. It should say Online.

Import users to Azure

We have to import the on premise users to Azure. I will connect MFA Server to my Active Directory using a specific account (service account). This is the same service account I am using to connect my NetScaler to my Active Directory.

Go to Directory Integration and select Use specific LDAP configuration. Then click on Edit.

Enter the service account details. Set the Queries and Authentications to Simple and click on Test.

Click on OK on the connection successful dialogue.

Then click on OK to close the Edit LDAP Configuration window.

Go to Company Settings and enable Use LDAP unique identifier attribute for matching usernames.

Now MFA Server is setup to read the Active Directory users. Let’s import them. Go to Users and click on Import from LDAP.

Navigate to the container where your users are. You can then select specific users, or just select the container and then import. Check the box Add new users and also Enabled to enable users where the Phone Number is already in Active Directory. Click on Import.

It will tell you how many users were imported. Click on OK.

Test Azure user connection

Now that we have the users in Azure, it is time to test! Let’s see if the MFA Server can communicate with Azure for a specific user we imported.

Go to Users and select a user. Click on Test.

You will get a popup asking you for password. Enter the password, and select LDAP Bind. Click on Test.

MFA Server will now connect and authenticate the user on Azure.

The user will get a phone call from Azure. Tap on Accept.

To accept the authentication you have to tap the # key.

Back on the MFA Server you will now get an Authentication successful message. Click on OK.

Configure NetScaler to use MFA

Before we can configure NetScaler, we have to setup a few things on the MFA Server to allow communications from the NetScaler.

Allow LDAP communication from NetScaler

We have to allow LDAP communication for NetScaler on the MFA Server. Go go LDAP Authentication and enable Enable LDAP Authentication. Click on Add.

Enter the NSIP of the NetScaler and give it a name. Check the box Require Multi-Factor Authentication user match. Click on OK.

Import LDAP service account

Now go to Users and import the service account you will be using to communicate from the NetScaler to the MFA Server when doing LDAP searches. This user has to be disabled, so make sure the phone number field is empty. Otherwise each time NetScaler queries the MFA Server for LDAP searches, MFA will also call the service account user.

Automatic user synchronization

Enable automatic synchronization between Active Directory users and Azure. This way you won’t have to manually add or remove users to Azure (as long as they are in the correct container).  Go to Directory Integration, click on the tab Synchronization and select Enable synchronization with LDAP. Configure the interval as you like.

Add MFA as LDAP Server on NetScaler

Log into you NetScaler management interface. Navigate to System -> Authentication -> LDAP -> Servers. Click on Add.

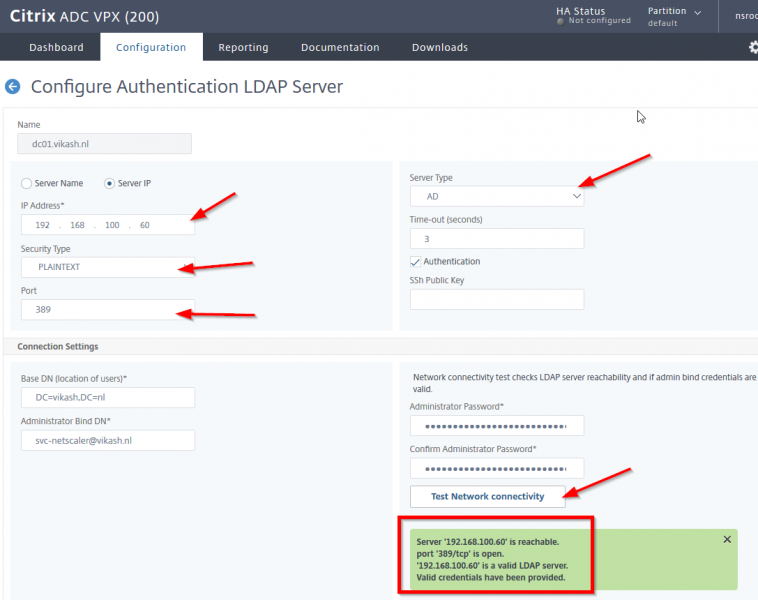
Enter a name, and specify the IP address of you MFA Server as LDAP server. Then enter the information of the service account we will use to authenticate NetScaler to the MFA Server. Make sure to set the Time-out to a time in which the user has to accept the MFA request, either using phone call or the authenticator mobile app. In my case the user has 3 minutes to complete the authentication. Then click on Test Connection. If everything went fine, the green box will appear.

Scroll to the bottom of the page and click on Create.

You should now see the MFA Server in your list of LDAP Servers on the NetScaler.

Add LDAP policy for MFA Server on NetScaler

Navigate to System -> Authentication -> LDAP -> Polcies and click on Add.

Give it a name, and make sure to select your MFA LDAP Server. Enter ns_true in the expression box and click Create.

Enable MFA Authentication for NetScaler Gateway

In a previous post I setup NetScaler Gateway for SSL VPN. I will modify that to use MFA for authentication. It is the same concept for other NetScaler Gateway Virtual Servers you have.

Navigate to NetScaler Gateway -> NetScaler Gateway Virtual Servers. Select your virtual server and click on Edit.

Scroll down to the Basic Authentication section and select your LDAP Policy.

Select the already existing LDAP policy to unbind it. Click on Unbind.

Click on Yes to confirm.

Now we can bind the MFA LDAP Policy we created earlier. Click on Add Binding.

Make sure it the MFA LDAP policy is selected and then click on Bind.

Then click on Close.

Scroll down to the page and click on Done.

Time for testing

Browse to your NetScaler Gateway page. In my case that is: https://vpn.vikash.nl/. Log in using a user which is enabled for MFA. Click on Log On.

After clicking on Log On the page will not refresh. Remember the Time-Out value we adjusted earlier? This is the time this page will wait for you to authenticate. Azure will now call the user on the phone number supplied. Click on Accept.

Tap on the # key to accept the authentication request.

Then the browser page will refresh, because the NetScaler will receive a successful authentication message from the MFA Server.

You can see this happening when you enable authentication debugging the NetScaler.

The next step is to Setup Azure MFA User Portal for Self Service.

Azure Multi-Factor Authentication Server with Citrix NetScaler Read More
SSL connection from NetScaler to IIS back-end breaks

Table of Contents

Reading Time: 2 minutes

SSL connection from NetScaler to IIS back-end breaks when you load balance SSL websites using IIS and Citrix NetScaler. Recently I ran into a problem which, according to this Citrix article, should not be a problem anymore in the most recent Citrix NetScaler build.

In my case I was trying to load balance two Citrix StoreFront servers. On both servers the StoreFront website was configured to use SSL. Direct connections from end-points were working fine, but when I tried to access the StoreFront page using the load balancing virtual server, I get presented with the SSL certificate (same one I had on StoreFront), and then the website just kept loading while showing only a blank page. I then remembered the Citrix article: https://support.citrix.com/article/CTX205578.
NetScaler version

At this point I was the running the latest version of Citrix NetScaler (11.1 51.26nc).

Event ID 36888

I went to my StoreFront server, and opened up the Event Viewer. This was the event ID I saw.

Disable TLS 1.1 and 1.2 on Citrix NetScaler Service Group

The next step is to disable TLS version 1.1 and 1.2 on the Service Group which I configured on the load balancing virtual server.

Click on the Edit icon on the SSL Parameters horizontal bar.

Make sure to uncheck TLSv11 and TLSv12. Leave TLSv1 checked. Then click on OK.

That should do the trick and your SCHANNEL events should not be happening anymore, load balancing virtual server should be working fine and all should be well.

This concludes this blog post. Feel free to contact me of you have any questions or comments.

You can follow me on twitter or add the RSS feed from my blog and you will be notified when I add new posts.

SSL connection from NetScaler to IIS back-end breaks Read More