Table of Contents
So you have Citrix NetScaler running to load balance your Microsoft Exchange 2016 infrastructure. What else can you use it for you ask yourself. Well, you know that VPN appliance you have running just for VPN? Get rid of it, because Citrix NetScaler can provide you with full-blown SSL VPN! With Citrix NetScaler VPN you can provide your end-users with full SSL VPN (Virtual Private Network) access in order to ensure that resources in your network are securely accessed. Citrix NetScaler provides access to any device anywhere.
Deliverables of this post:
- Citrix NetScaler SSL VPN Setup with full access to your network.
- SSL VPN access using Microsoft Windows 10 desktop.
- SSL VPN access using Apple iOS (iPhone or iPad).
Requirements for the configuration:
- Citrix NetScaler 11.1 (www.citrix.com).
- NetScaler Gateway Universal License.
- Ip addresses for the virtual server for VPN.
- Valid SSL certificate.
- Active Directory for user authentication.
- A hostname, in my case https://vpn.vikash.nl. This must match your SSL certificate.
My homelab setup
I am running this whole setup from my Microsoft Hyper-V 2016 Server, running all of my Microsoft Windows virtual machines. This Hyper-V Server is also running my Citrix NetScaler.
So let’s start.
Create Session Profile
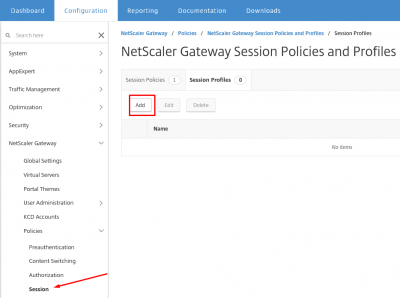
First we have to create the session profile and then the session policy. Navigate to NetScaler Gateway -> Policies -> NetScaler Gateway Policies and Profiles -> Session and click on Session Profiles. Then click on Add.
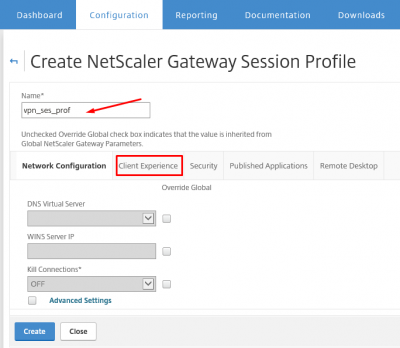
Give the profile a name and click on Client Experience tab.
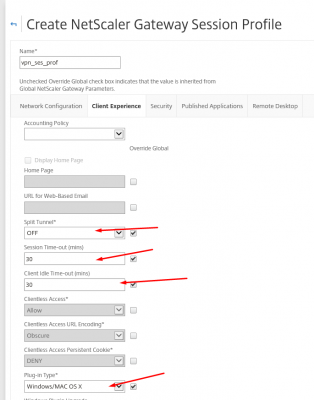
Set the time-out values according to your needs. Because we want to redirect all the traffic from the client through the SSL VPN tunnel set Split Tunnel to OFF. Set the plug-in type to Windows/MAC OS X.
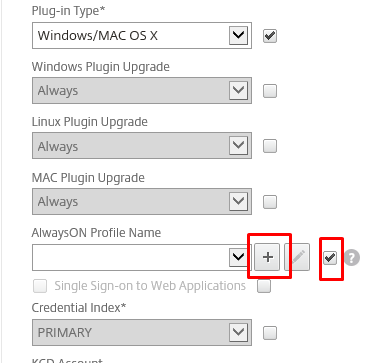
We have to create an AlwaysON profile. Click on the + (plus) sign.
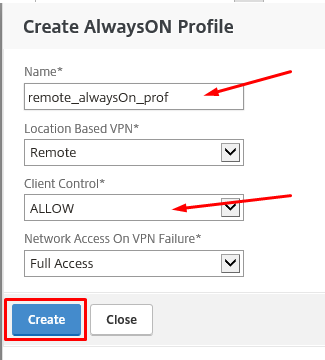
Give the AlwaysON profile a name and set Client Control to ALLOW. Click then on Create.
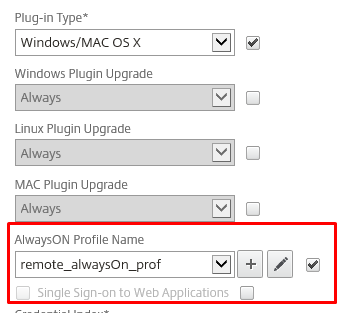
Make sure the AlwaysON profile we just created is selected.
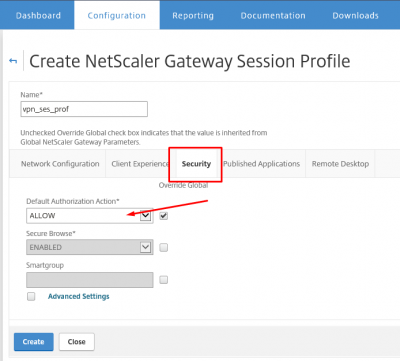
Now click on the tab Security and set the Default Authorization Action to ALLOW.
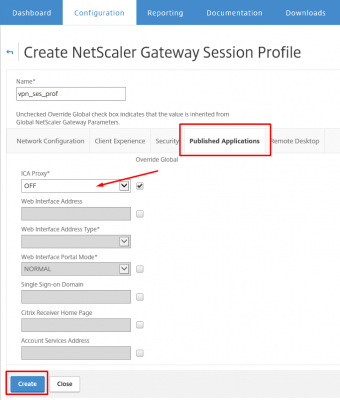
Click on the Published Application tab and make sure that ICA Proxy is set to OFF. Then click on Create.
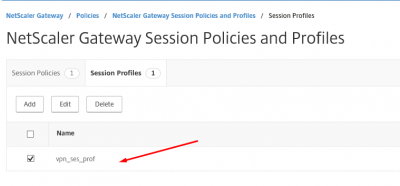
So now your session profile should be available in the Session Profiles overview.
Create Session Policy
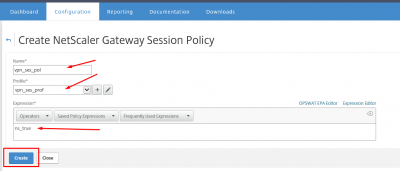
After creating the session profile, it is time to create the Session Policy for the session profile we just created. Navigate to NetScaler Gateway -> Policies -> NetScaler Gateway Policies and Profiles -> Session Policies. Click on Session Policies and then click on Add to create a new policy.
Give the policy and name and enter ns_true in the Expression section. Then click on Create.
The newly created policy should now be available in the Session Policies overview.
Configure the VPN Virtual Server
After creating the profile and policy we can now create the NetScaler Gateway Virtual Server. This is the virtual server providing the VPN access to the end-user. So if you have firewall or nat-appliances, make sure that your external port 443 is redirected to this virtual server.
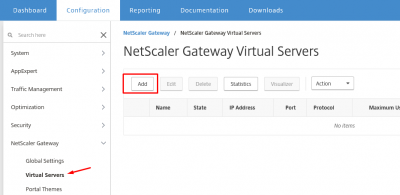
Navigate to NetScaler Gateway -> NetScaler Gateway Servers -> Virtual Servers and click on Add.
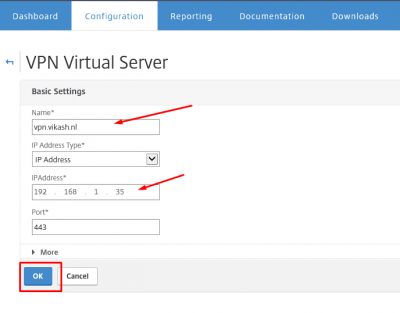
Give the virtual server a name. Set the IP address and click on OK.
Bind the SSL certificate
Let’s bind the SSL certificate to this virtual server. Click here to check my post about importing SSL certificates on Citrix NetScaler. Click on No Server Certificate.
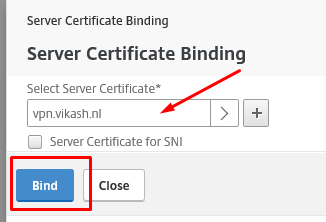
Select the SSL certificate and click on Bind.
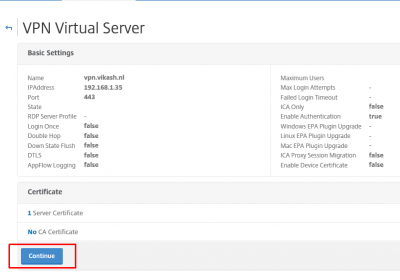
Click on Continue.
Add authentication
I am using my Active Directory as primary (and only) user authentication. If you require second authentication, you can add it here as well.
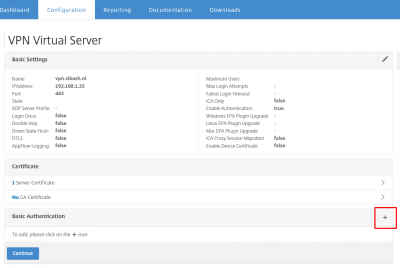
Click on the + (plus) sign on the Basic Authentication horizontal bar.
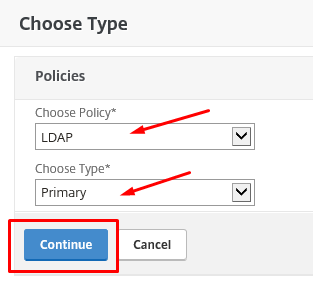
Select LDAP for Active Directory authentication. Choose Primary as Type. Click on Continue.
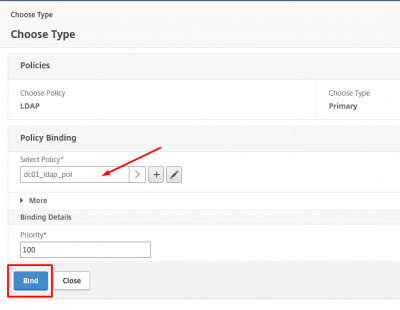
Select your LDAP policy. This contains the Active Directory authentication server. Click then on Bind.
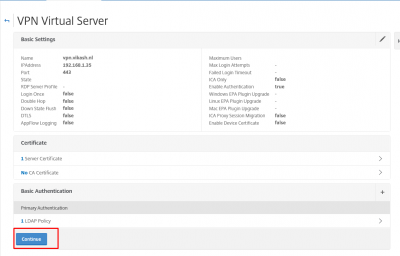
Click on Continue.
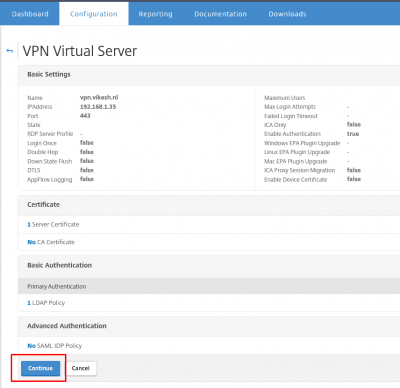
And click again on Continue.
Bind the session policy
Now we can bind the session policy created earlier. Click on the + (plus) sign on the Policies horizontal bar.
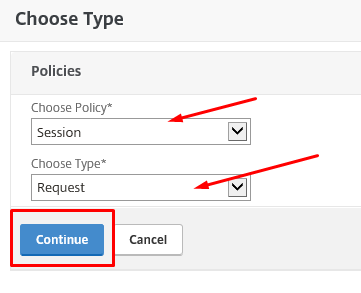
Make sure you have Session as policy and Request as type selected. Click on Continue.
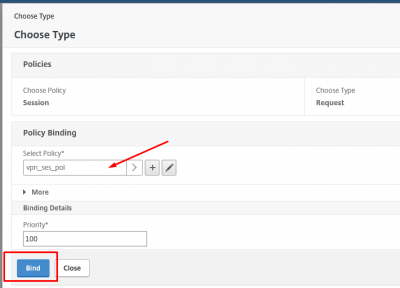
Select the session policy we created earlier in this post and click on Bind.
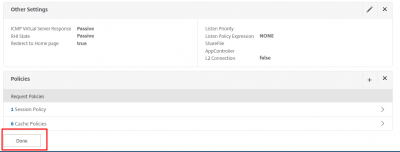
Now click on Done.
In the overview of the NetScaler Gateway Virtual Servers we can see the virtual server being available with status UP.
Testing with clients
So now we have configured the VPN service on Citrix NetScaler, it is time to test it using different endpoints. In my case I will test using a Windows 10 desktop, and an Apple iPhone with iOS 10.2.1.
Windows 10 SSL VPN client
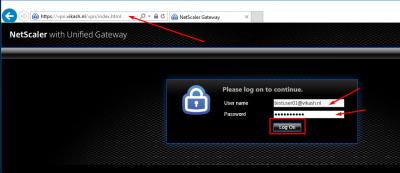
Start a browser on your desktop, and navigate to the hostname where the virtual server is listening. In my case that is https://vpn.vikash.nl. This translates to the IP address of the virtual server on my NetScaler.
Enter a username and password. Click on Log On.
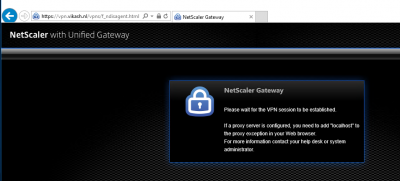
Please wait.
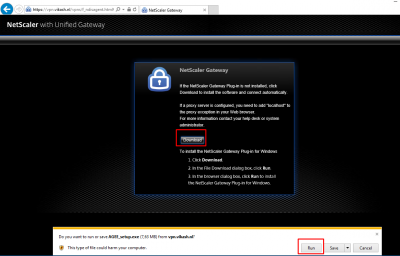
Because this desktop client logs in for the first time, it does not have the NetScaler Access Gateway Plug-in installed. You will be prompted to install it. Click on Download and then Run the installer.
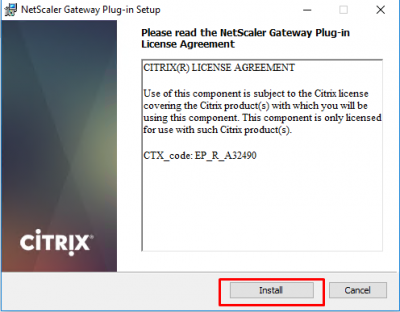
Click on Install.
When the installation process finishes, click on Finish.
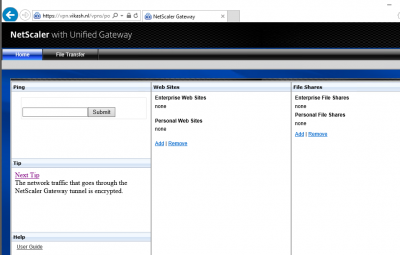
The browser page will refresh, and you will have a full-blown SSL VPN session now using Citrix NetScaler.
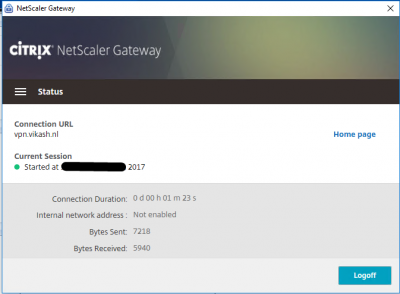
Check the status of the SSL VPN session using the NetScaler Gateway status option by clicking the icon in the notification area in the taskbar.
Apple iOS (iPhone / iPad) client
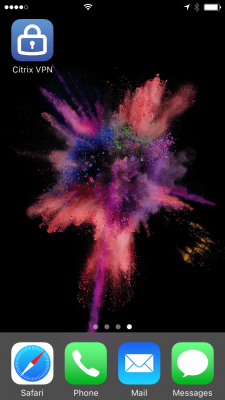
Make sure you have installed the Citrix VPN app from the Apple App Store. Get it here. Start the app on your iPhone.
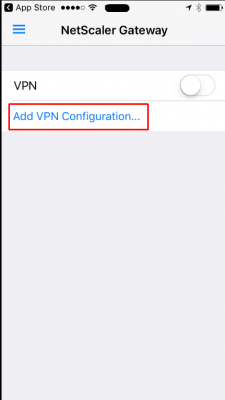
Tap on Add VPN Configuration.
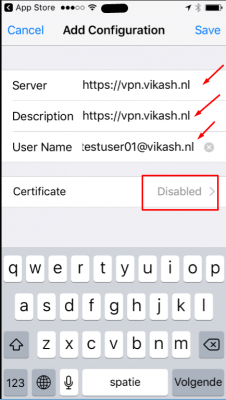
Enter the VPN details and add a user account. Tap on Disabled to set the Certificate options.
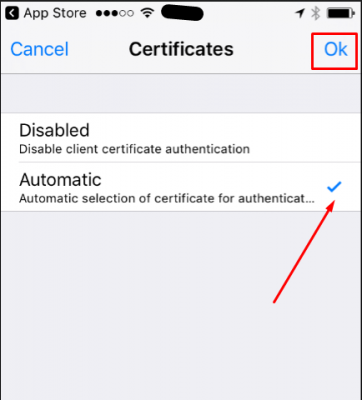
Select the Automatic option. Tap on Ok.
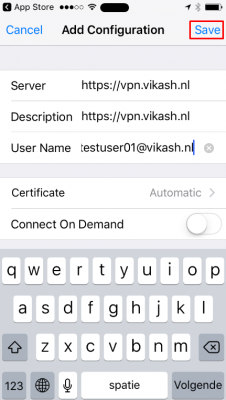
Now tap on Save.
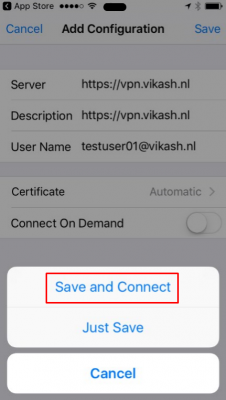
And then tap on Save and Connect to start the VPN connection.
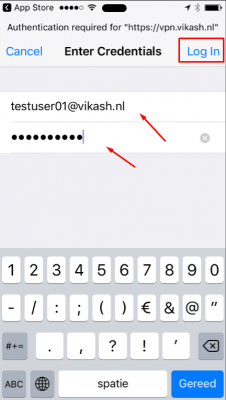
You will be prompted to enter the password for the user. Then tap on Log In.
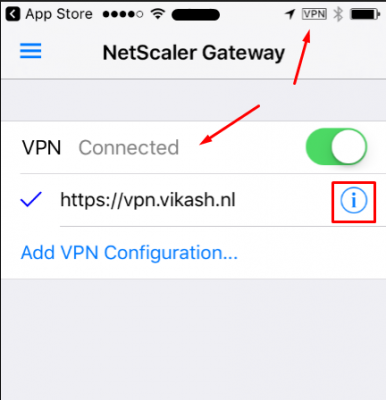
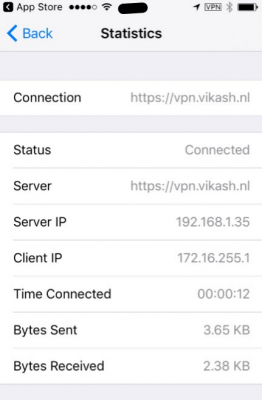
The VPN should now be connected! You can also see the connection status in the app and on the upper-right corner of your iOS device. If you tap op the i next to Connected you can see more information about the VPN session.
This concludes this tutorial. Feel free to contact me of you have any questions or comments.
You can follow me on twitter or add the RSS feed from my blog and you will be notified when I add new posts.










Hi Vikash,
Nice article,
However, I have one question here, where we define IP address in NetScaler VPN setup? What will IP address get the client when they connected to NetScaler VPN?
Regards,
Chandrasekhar Reddy
The IP address the client gets from the NetScaler doesn’t matter. The SNIP is the endpoint from your network perspective. Good luck.